Powered by Comercia.io
SVT SHOP BLOG / PROFESSIONAL STENCIL GUIDE
Tattoo Stencils That Last: Thermal Paper, Printers & Stencil Primers
A practical 2026 guide to transferring designs onto real skin. Compare thermal and freehand stencil paper, portable thermal printers and Epson EcoTank inkjet systems, and stencil primers, applicators and removers. Learn why lines blur, when to let them set and how to protect the reference during a tattoo session.
KEY TAKEAWAYS
SVT Shop · El Paso, Texas · Next Day Delivery available in El Paso
THE SHORT ANSWER
Quick Answer: How Do You Keep a Tattoo Stencil Clear During a Session?
Prepare clean, shaved-when-needed, completely dry skin, choose the correct thermal, freehand or inkjet transfer paper, and apply a thin, even layer of the appropriate stencil transfer agent. Place the stencil once, press without sliding, peel carefully and allow it to set before tattooing; InkJet's published method calls for 30–60 seconds of pressure and typically 3–5 minutes of drying, while Spirit instructs artists to let its transfer set before wiping. During the procedure, follow the particular stencil system's cleaning directions instead of using a wipe mixture that removes the lines.
IDENTIFY THE FAILURE FIRST
Why Tattoo Stencils Blur, Smear or Disappear
A stencil works as a temporary visual reference on skin. Its usefulness depends on the clarity of the original drawing, the correct paper or ink system, the way it is pressed onto the body and what happens during cleaning. When a line spreads or fades, the problem may begin before the needle touches the skin.
Movement during transfer is one of the clearest causes of blurred lines. Spirit explicitly instructs artists not to move the stencil after it contacts the skin because repositioning the sheet can make the image bleed or blur. InkJet's application guide identifies sliding as a cause of smearing.
Excess moisture is another practical problem. InkJet advises removing oil, lotion and residue, allowing the skin to dry fully and applying its stencil preparation product in a thin layer until slightly tacky. It warns that placing the sheet onto an overly wet surface can blur the lines.
Cleaning products during tattooing can change the transferred image. InkJet specifically warns that green soap and other mixtures containing alcohol degrade its stencil dye. The wiping process must therefore be matched to the transfer system the artist actually uses.
A heavy application of primer can also complicate the transfer. Spirit instructs artists to apply a thin layer of transfer agent; InkJet similarly directs a thin, even coat. Adding more product is not a substitute for dry skin and steady placement.
Finally, look at the original stencil output. A faint thermal print, a misfed sheet, a poorly defined digital design or an incorrectly configured inkjet printer can leave the artist with lines that are difficult to follow before application even begins. Diagnose print quality separately from skin-transfer quality.
If the lines are fuzzy immediately after lifting the paper, first review skin dryness, primer quantity and whether the sheet moved. If the lines looked crisp at first but faded during tattooing, examine the drying period and the rinse or wiping products used during the session.
BEFORE THE STENCIL TOUCHES SKIN
How to Prepare Skin for a Tattoo Stencil Transfer
The InkJet Stencils application guide begins with a simple instruction: prepare skin that is clean and completely dry. The manufacturer recommends shaving when necessary, removing oil, lotion and other residue, and waiting for the surface to dry before using its stencil application product.
Hair can interfere with the even contact needed for a detailed transfer. Where shaving is part of the professional procedure, complete it before applying the transfer agent. Take the same care with areas that naturally collect lotion, sweat or other skin-care products.
After the studio's normal skin-preparation procedure, check for remaining oily or slippery areas. The transfer sheet needs consistent contact with the actual tattoo location. Uneven preparation can produce strong sections of line beside weak or incomplete sections.
Let the surface become dry before proceeding. InkJet explains that placing its stencil onto a wet preparation layer can blur the image. The purpose of the transfer product is to support a controlled transfer, not to leave a visibly wet layer beneath the paper.
Before opening the primer, check the design's orientation and the intended placement. For arms, legs, shoulders and curved areas, identify a way to position the full design with minimal adjustments once the transfer sheet touches the body.
This guide addresses stencil transfer onto real skin during a professional tattoo procedure. For synthetic practice materials and early equipment selection, consult SVT Shop's separate Tattoo Practice Supplies guide.
UNDERSTAND THE PAPER
Thermal Tattoo Stencil Paper: Layers, Onionskin and Sizes
Thermal transfer paper lets an artist reproduce an existing design through a compatible thermal stencil machine. The finished transfer is then placed against skin with an appropriate transfer agent. It is distinct from inkjet stencil paper and from a freehand transfer sheet prepared by tracing.
Spirit's official instructions explain that its thermal papers have three sheets of paper plus a protective "onionskin" sheet. For both thermal and impact papers, Spirit says to remove the onionskin before making the stencil.
Spirit's thermal papers, made for thermal stencil machines, have three sheets of paper plus a protective onionskin.
Spirit's impact or "write-on" papers, used for hand-drawn stencils, have two sheets plus the onionskin.
Spirit says to remove the protective onionskin before moving on to make the stencil.
Spirit papers are formulated for application onto skin with a transfer agent, ideally the cream made for that paper.
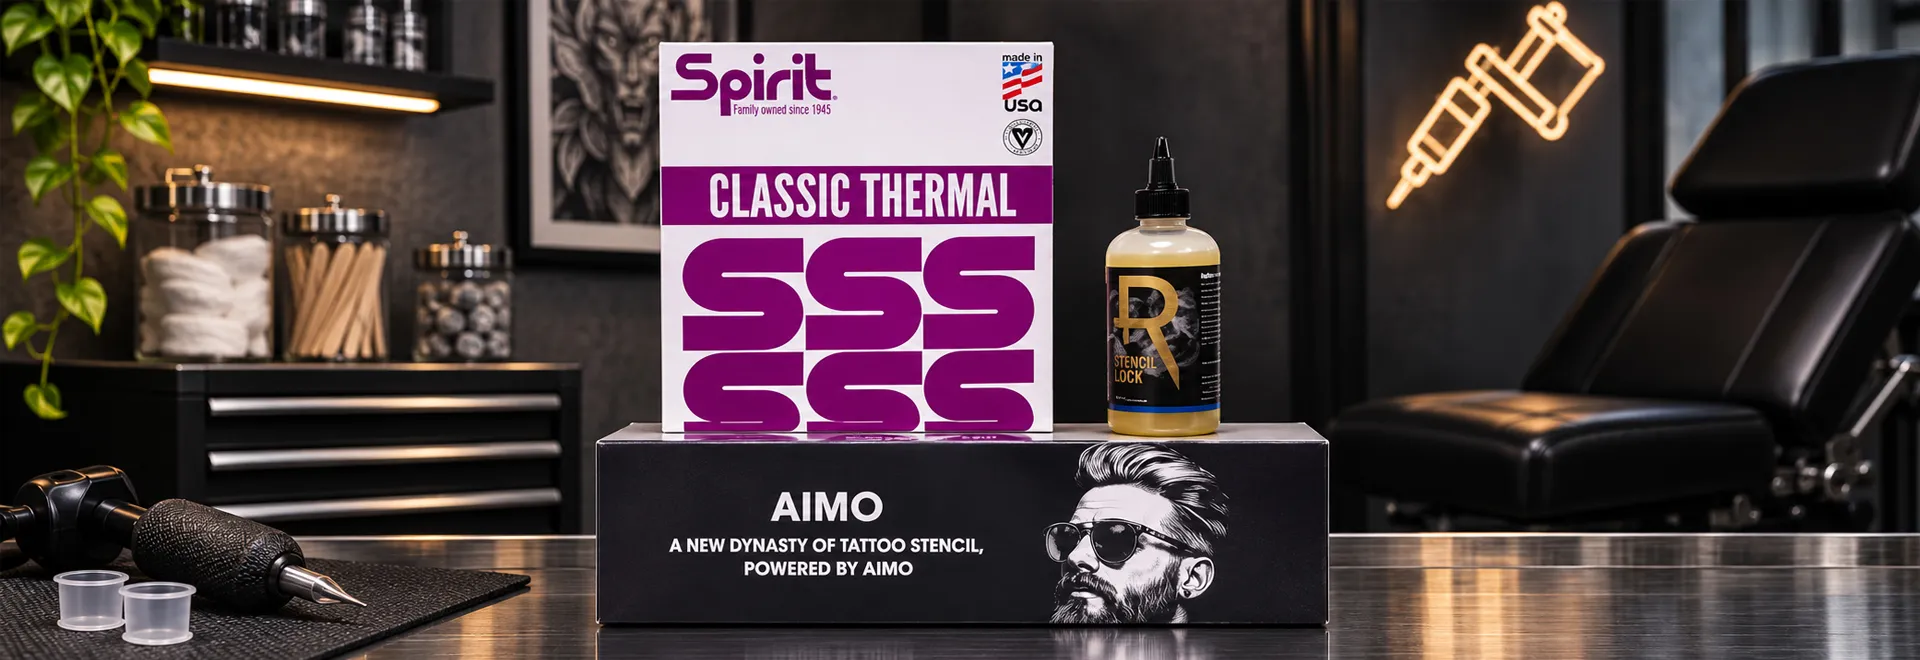
Spirit Classic Thermal Paper is available at SVT Shop in 8 1/2 x 11 inches and 8 1/2 x 14 inches. The longer format can accommodate a taller design when the thermal machine supports the paper length.
Spirit Classic Freehand Transfer Paper is designed for tracing and hand-created stencils without a thermal copier. Spirit calls this type an impact or "write-on" paper. SVT Shop's linked product contains 10 sheets.
Spirit's guide explains that its freehand or impact paper uses two functional sheets plus an onionskin. The protective onionskin is removed for that process as well. The artist then draws or traces using the appropriate freehand method.
Dynamic Stencil Magic Paper is another transfer-paper option. Dynamic's official product information describes a 100-sheet format for both thermal and hand-drawn applications, with a wax-coated backing and a deep violet pigment. For printer loading, confirm whether the supplied paper is letter size or A4: U.S. letter is 8.5 x 11 inches, while A4 is 210 x 297 mm.
TWO DIFFERENT PRINTING SYSTEMS
Thermal Tattoo Stencil Printer vs. Epson EcoTank Inkjet Stencils
The word "stencil printer" can describe different technologies. Thermal stencil machines work with an appropriate thermal transfer-paper assembly. InkJet Stencils uses a refillable Epson EcoTank inkjet printer, dedicated stencil ink and dedicated inkjet stencil paper.
A thermal workflow begins with preparing the design, removing the protective paper layer and feeding the correct stencil-paper assembly into the thermal machine according to its instructions. The output is a transfer sheet ready for use with the selected stencil primer.
InkJet Stencils describes its system as a patented inkjet approach introduced in 2018. The maker's process involves printing a digital design from an iPad or computer using an Epson EcoTank with refillable ink tanks, InkJet Stencils ink and matching printing paper.
The manufacturer recommends setting the printer's paper type to Presentation Paper Matte and using its best-quality print setting. It instructs artists to size the artwork correctly, use clear contrast and mirror the image when necessary for the intended transfer orientation.
InkJet's guides call for a new Epson EcoTank tank printer, filled with stencil ink before it is powered on for the first time. InkJet recommends the monochrome ET-M1170 and says cartridge printers can't take its ink. It instructs users to set aside the Epson ink supplied with the printer rather than pouring it into the tank selected for stencil dye.
| WORKFLOW FEATURE | THERMAL TRANSFER | INKJET STENCILS |
|---|---|---|
| Printer technology | Thermal stencil machine | Epson EcoTank refillable inkjet printer |
| Transfer consumable | Thermal transfer paper with pigment layer | Dedicated InkJet Stencils ink and inkjet stencil paper |
| Design preparation | Prepare the paper assembly and run through a compatible thermal machine | Prepare a digital design, size and mirror as needed, then print |
| Paper example at SVT | Spirit Classic Thermal; Dynamic Stencil Magic Paper | InkJet Stencils 8.5 x 11-inch paper, 500 sheets |
| Transfer agent | Use a suitable transfer agent according to the paper maker | InkJet recommends its own Stencil-Prep application system |
| Manufacturer application timing | Spirit says hold for a few seconds and let the transfer set | Press 30–60 seconds; typically allow 3–5 minutes to dry afterward |
The linked InkJet Stencils 4 oz Ink and 8.5 x 11-inch Inkjet Stencil Paper, 500 Sheets are components of the manufacturer's inkjet method. Keep those components associated with the appropriate printer rather than treating them as consumables for a thermal machine.
A PORTABLE THERMAL OPTION
Tattoo Stencil Printer M8: Features and Buying Criteria
A portable printer can be relevant to artists working in a fixed studio, a guest spot or a convention where the stencil-preparation area is compact. The key questions are the printing method, document width, connectivity and the paper formats supported.
SVT Shop's Tattoo Stencil Printer M8 is a thermal stencil printer with a documented 203 DPI printing resolution and a maximum 210 mm print width. It connects through USB or Bluetooth to a phone, tablet or computer.
The product specification lists a 1,500 mAh battery and support for A4, A5, A6 paper and a 58 mm paper roll. These are the useful specifications to compare when planning where the printer will be used and what size stencil output the artist needs.
The M8 is a thermal system, so it belongs with a suitable thermal-paper workflow. InkJet Stencils ink belongs in an Epson EcoTank system instead. These are different approaches to preparing the transfer sheet.
Before ordering a printer, check the planned paper dimensions, the transfer system the artist already uses, and whether wired or Bluetooth connectivity fits the setup. For a taller design, compare the available paper format with the printer's supported feed and printing area.
VIEW TATTOO STENCIL PRINTER M8THE TRANSFER AGENT
Tattoo Stencil Primers, Gels, Creams and Liquids
After preparing the stencil and the skin, the artist applies a product intended to receive the transfer. These products are often called stencil primers, transfer agents, stencil gels or stencil creams. They serve the same broad workflow stage, but the exact application directions belong to the individual product and paper system.
Spirit recommends using the transfer cream specifically paired with the corresponding Spirit paper. It describes matching each paper to its appropriate cream and using a thin layer on the skin. InkJet similarly recommends its dedicated Stencil-Prep product within the InkJet system, while noting that other stencil application solutions are available.
Stencil Stuff
Tattoo Stuff markets Stencil Stuff as a product for applying stencil transfers to skin. Tattoo Stuff says it is made for longer-lasting, crisp, clean and sharper stencil transfers, and calls it vegan friendly.
VIEW STENCIL STUFFProton Pink, Blue & Black
Proton Stencil Primer Gel is a transfer-primer range with Colombian origins. Proton's description on Dynamic Color's site says it began in Medellín, is made in Spain from its Colombian master formula, has a wax-like texture and lasts more than 15 hours on the skin. SVT Shop offers the named Pink, Blue and Black gel versions as individual products.
Dynamic Stencil Magic
Dynamic sells Stencil Magic as a dedicated stencil application product in an 8 oz bottle, part of the manufacturer's stencil preparation and removal range. Dynamic says it gives a crisp, ready-to-tattoo stencil that holds up through the entire piece.
VIEW DYNAMIC STENCIL MAGICRecovery Stencil Lock
Recovery Stencil Lock is described by Recovery as a stencil application cream that produces a detailed transfer with only a few drops and works with a variety of rinse solutions. Recovery lists it as paraben-, fragrance- and dye-free. SVT Shop carries individual 4 oz and 8 oz versions.
Start with one manufacturer-approved transfer workflow for the paper or ink being used. The practical goal is an even transfer that remains readable after the sheet is lifted and the intended setting period has passed.
Adding a generous coating of primer does not replace cleaning and drying the skin. Spirit and InkJet both instruct artists to use thin applications. InkJet additionally warns that the transfer becomes blurry if its preparation layer remains wet during contact.
THE APPLICATION SEQUENCE
How to Apply a Tattoo Stencil Without Smearing It
The core transfer method is a sequence: prepare the skin, apply the appropriate transfer agent, position the sheet, press without movement, peel carefully and wait for the image to set. Spirit and InkJet publish related procedures with different product-specific timing.
-
Confirm the size, orientation and placement.
Prepare the design to match the tattoo location. Mirror it if necessary for the transfer system, and identify the intended alignment before applying the primer.
-
Prepare skin that is clean and dry.
InkJet directs artists to shave if needed, remove oil and lotion, and allow the skin to dry completely before applying its transfer product.
-
Apply a thin, even transfer layer.
Spirit calls for a thin coat of transfer agent. InkJet's Stencil-Prep method involves rubbing a thin layer into the skin until it becomes slightly tacky.
-
Place the stencil face-down once.
Align the design and make contact with the skin. Spirit warns that moving the sheet after contact blurs and spreads the stencil.
-
Press steadily without sliding.
Use the method for your chosen system. Spirit says to hold the sheet for a few seconds; InkJet specifies firm, even pressure for 30–60 seconds, including curved areas.
-
Peel the paper away carefully.
InkJet instructs artists to lift gradually from one edge. Inspect whether all the needed reference lines transferred before proceeding.
-
Allow the image to set.
Spirit instructs artists to let the stencil set before wiping. InkJet's application guide describes letting the transfer dry fully, typically for 3–5 minutes, before tattooing.
If the result looks doubled, streaked or out of alignment, evaluate the stencil before beginning the tattoo. An intentionally removed transfer can be reapplied after the area is properly cleaned and dried, using the remover directions for the chosen system.
For a complex stencil placed across a shoulder or another curved area, the artist should plan how to maintain even contact without pulling the sheet across already transferred lines. InkJet specifically instructs artists to apply pressure across the whole design while keeping the paper stationary.
USE BRAND-SPECIFIC TIMING
How Long Should a Tattoo Stencil Set Before Tattooing?
Drying and contact time are separate parts of transfer application. The pressing stage moves the design onto prepared skin; the setting stage allows the transferred reference to become ready for the session. Use the timing from the applicable manufacturer rather than one universal number.
| SYSTEM | CONTACT OR PRESSING | SETTING BEFORE TATTOOING |
|---|---|---|
| Spirit transfer paper | Hold the stencil in place for a few seconds | Carefully remove the sheet and allow the image to set before wiping |
| InkJet Stencils with Stencil-Prep | Rub the thin preparation coat until tacky, approximately 1–2 minutes; press the sheet 30–60 seconds | Allow the transfer to dry completely, typically 3–5 minutes |
InkJet's figures belong to the manufacturer's InkJet Stencils and Stencil-Prep application method. Spirit's instructions focus on a short contact followed by setting before wiping. For Stencil Stuff, Proton, Dynamic Stencil Magic and Recovery Stencil Lock, follow the directions supplied with the product selected for that stencil.
If the transfer still looks wet, do not begin rubbing or wiping over it. InkJet specifically connects wet skin and a wet transfer surface with blurring. A clear image at the beginning of the session depends on completing the preparation steps.
Spirit instructs artists to let the image set before wiping. InkJet provides a typical 3–5-minute post-transfer drying period for its own system. Keep the setting stage separate from the time the sheet is pressed onto skin.
PROTECT THE REFERENCE DURING THE PROCEDURE
How to Wipe During Tattooing Without Losing the Stencil
Even a clear initial transfer can become difficult to follow if the wiping routine removes its lines. The manufacturer of the stencil system should guide the choice of rinse or wiping mixture during the procedure, particularly where the transferred dye reacts to common cleaning products.
InkJet Stencils specifically warns against wiping its stencil with green soap or mixtures that contain alcohol. The company states that those products degrade the transferred image. This is a product-specific direction that matters when planning the InkJet workstation.
InkJet's instructions mention that artists report using distilled water, witch hazel or Dr. Bronner's soap as alternatives during its stencil workflow. Select and use the actual rinse solution according to the stencil manufacturer's instructions and your professional studio procedures.
For any stencil system, keep wiping controlled. Avoid dragging a saturated towel across the entire design when the task only requires cleaning the immediate working area. A transfer can lose legibility through unnecessary repeated rubbing even when the original image was well placed.
When working on a large design, consider which reference lines are essential for later stages of the session. Keep the unworked areas visible as long as they are needed instead of treating the whole stencil as a surface to be scrubbed clean between every pass.
If the artist uses a different paper and transfer agent from the InkJet system, follow that manufacturer's wiping directions. The appropriate routine should be chosen alongside the paper and primer rather than decided after the stencil begins to disappear.
WHEN PLACEMENT NEEDS TO CHANGE
How to Remove a Tattoo Stencil and Reapply It
A stencil may need to be moved because its angle, scale or relationship to another tattoo is not right. The controlled approach is to remove the unwanted image, prepare the area again and apply a fresh transfer. Sliding the original sheet after contact is a cause of blurring, according to Spirit and InkJet.
InkJet Stencils states that its transfer can be intentionally removed using rubbing alcohol. Its guide instructs artists to make sure the skin is dry before reapplying the stencil. Use the alcohol-removal step as an intentional reset, not as the routine for wiping the stencil you want to preserve during tattooing.
Dynamic Tattoo Stencil Magic Remover is a separate 8 oz stencil remover. Dynamic markets it for wiping away an unwanted transfer and preparing to reposition the design.
Prep Stuff, from the makers of Stencil Stuff, is sold for skin preparation and stencil removal. The manufacturer describes using it to remove a transfer when the placement needs correction, before applying the stencil again. Tattoo Stuff also says that using Prep Stuff before the stencil helps it hold even better with Stencil Stuff.
Spray Stuff serves a different job: Tattoo Stuff markets it to help preserve drawings made directly on the skin with markers or pens. The manufacturer instructs artists to spray a light mist over the completed hand-drawn reference and allow it to dry.
Dynamic Stencil Remover
A dedicated product for clearing an unwanted stencil before a new placement.
VIEW DYNAMIC REMOVERTattoo Stuff Prep Stuff
Sold for skin preparation and for removing a transfer that needs repositioning.
VIEW PREP STUFFTattoo Stuff Spray Stuff
Sold for setting marker or pen drawings used during freehand tattoo work.
VIEW SPRAY STUFFAfter removal, return to the initial workflow: confirm the new alignment, prepare a dry surface, apply the appropriate transfer product and keep the new sheet stationary while pressing. A deliberate reset is preferable to building a second blurred image over the first.
PREVENT MESS AND PREPARE CONSISTENTLY
Stencil Ink, Paper and Printer Handling
Stencil creation can involve transferable dye, delicate paper assemblies and printing equipment. InkJet's official setup guide specifically warns that its stencil dye stains skin and nearby surfaces. The manufacturer instructs artists to put on gloves and protect the workstation before opening the bottle or filling a printer.
With an Epson EcoTank system, InkJet directs users to set aside the ordinary Epson ink that accompanies a new printer. The stencil ink is loaded into the tank according to InkJet's setup instructions, and the printer is then configured to print on the recommended paper type.
Store thermal and freehand transfer paper where the sheets will remain clean, flat and organized by size. Keep the protective onionskin in place until the point in the preparation workflow when Spirit directs its removal. Avoid mixing thermal and inkjet paper in the same unmarked stack.
Keep reusable printer equipment and consumables organized around their matching technology. Spirit Thermal and Dynamic Stencil Magic Paper serve thermal or hand-drawn workflows, while InkJet's proprietary printing paper and liquid dye serve its EcoTank method.
During digital preparation, check the design size before printing multiple sheets. InkJet's official printing guidance emphasizes clean, high-contrast artwork, correct scale and mirroring when necessary. Poor digital preparation can make the resulting stencil difficult to interpret even when the transfer itself is sharp.
For a shared studio, label consumables with the paper type and intended system. An artist preparing a large back piece and an apprentice making a small hand-drawn stencil should be able to select the correct paper without guessing.
SOLVE THE RIGHT PROBLEM
Tattoo Stencil Troubleshooting: Symptom, Cause and Correction
Use the symptom to identify which step needs attention. A weak image coming out of the printer has a different cause from a clean print that smears during transfer or a correctly applied stencil that begins to fade during repeated wiping.
| SYMPTOM | LIKELY CAUSE | PRACTICAL CORRECTION |
|---|---|---|
| Lines look doubled | Sheet moved after touching skin | Remove and reposition the stencil; press without sliding |
| Lines spread or blur | Skin or transfer-agent layer was too wet | Clean, dry fully and apply a thin, even transfer layer |
| Some lines did not transfer | Uneven contact on a curved area | Plan placement and apply firm, even pressure across the whole design |
| Thermal stencil is incomplete | Paper prepared or loaded incorrectly | Check the onionskin and the printer's paper instructions |
| Inkjet print is faint | Ink or paper setup needs correction | Check the dedicated EcoTank setup, print configuration and ink supply |
| Stencil fades during wiping | Rinse product degrades the transfer dye | For InkJet, avoid green soap and alcohol mixtures over the stencil; follow its wiping guidance |
| Stencil smears before tattooing | Image wiped before it finished setting | Allow the required post-transfer drying period |
| Placement is incorrect | Design alignment was not finalized | Use an appropriate remover, dry the skin and make a new transfer |
| Ink stains the workstation | Stencil dye contacted an unprotected surface | Use gloves and protect the work area before handling InkJet dye |
| Freehand drawing loses clarity | Marker reference disturbed during work | Follow the manufacturer guidance for hand-drawn references, including Spray Stuff |
Troubleshooting is based on the processes described by Spirit, InkJet Stencils, Dynamic and Tattoo Stuff. Inspect the full setup before repeating a transfer.
First inspect the printed or hand-created design. Then inspect the skin preparation, amount of transfer agent, placement and drying. Finally, review which product is used for wiping during the procedure. Fixing the failed stage makes the next attempt more consistent.
MATCH THE METHOD TO YOUR STUDIO
Three Practical Stencil Workflows for Tattoo Artists
The right stencil system depends on how the studio prepares artwork and how often designs are printed or drawn. A thermal printer, an Epson EcoTank inkjet system and freehand paper can all be organized into a professional procedure when their matching consumables and application steps are followed.
Thermal paper and portable printer
Prepare the digital design, select Spirit Classic Thermal or Dynamic transfer paper, and make the stencil with a compatible thermal machine such as the M8. Apply with the selected transfer agent and follow the paper manufacturer's contact instructions.
Useful when the artist wants a dedicated thermal workflow with paper sheets and a compact printing setup.
EcoTank, stencil dye and inkjet paper
Prepare clean digital artwork and print on the dedicated InkJet Stencils paper using an appropriately configured Epson EcoTank. Apply using the InkJet manufacturer's method, press for 30–60 seconds and allow the completed transfer to dry.
Useful when the studio already organizes its design preparation around a computer or tablet and wants the manufacturer-defined inkjet process.
Freehand paper and marker planning
Use Spirit Classic Freehand paper when making an image by tracing without a thermal copier. For artwork drawn directly on skin with markers, Tattoo Stuff sells Spray Stuff for setting those marks.
Useful when the artist creates or adapts the design by hand and wants the corresponding transfer or drawing-reference product.
A studio may keep more than one of these workflows available. The main consideration is whether the paper, ink, printer and transfer product belong to the same method and whether the artist understands the required setting process.
For a broader list of tools used to prepare a professional workstation, see SVT Shop's First Professional Tattoo Setup. The present guide focuses specifically on stencil creation, application and retention on real skin.
BUILD A COMPLETE STENCIL STATION
Tattoo Stencil Kit Buying Checklist
Start with the stencil method and select compatible consumables. Then include the application, cleaning and removal products needed to complete that workflow. This checklist works for a fixed tattoo studio or an artist preparing for a guest spot.
- I selected thermal, inkjet or freehand transfer as my primary method.
- I chose the correct paper size for the design and equipment.
- I know when to remove the protective onionskin.
- I checked the printer's supported paper format and connectivity.
- I have dedicated stencil ink and paper if using Epson EcoTank.
- I have the appropriate stencil transfer agent for the selected paper or ink.
- I can prepare clean, dry skin before applying the stencil.
- I will use a thin transfer layer and keep the sheet stationary.
- I know the manufacturer's contact and setting instructions.
- I planned the correct wiping products for the selected stencil.
- I have a suitable remover if placement must be corrected.
- I have gloves and protected work surfaces when handling stencil dye.
- I can keep thermal, freehand and inkjet supplies organized separately.
Select the transfer material
Compare Spirit Classic Thermal, Spirit Freehand, Dynamic Magic Paper and InkJet Stencils Paper.
BROWSE STENCIL PAPERSChoose the application product
Review Stencil Stuff, Proton, Dynamic Stencil Magic and Recovery Stencil Lock for your paper workflow.
BROWSE APPLICATORSPrepare the printer
Match the M8 thermal workflow or a manufacturer-specified Epson EcoTank inkjet system to its consumables.
BROWSE STENCIL MACHINESPlan for repositioning
Keep a dedicated stencil-removal method available if the placement needs to be changed.
BROWSE STENCIL REMOVERSArtists using InkJet's digital system can browse its dedicated Stencil Ink category. Remember to select the manufacturer-specified printer and paper together with the ink.
STENCIL PRODUCTS AT SVT SHOP
Shop Paper, Printers, Primers and Removers
SVT Shop helps tattoo artists, apprentices and studios choose professional supplies in El Paso, Texas. Next Day Delivery is available in El Paso. Build your stencil system around the transfer method and the consumables intended for it.
Spirit Classic Thermal
8.5 x 11-inch and 8.5 x 14-inch paper formats for thermal stencil creation.
VIEW THERMAL PAPERSpirit Classic Freehand
Ten transfer sheets for a tracing workflow without a thermal copier.
VIEW FREEHAND PAPERDynamic Stencil Magic Paper
100-sheet format for thermal and manual stencil preparation.
VIEW DYNAMIC PAPERInkJet Stencils Ink
4 oz bottle for InkJet's dedicated Epson EcoTank system.
VIEW INKJET INKInkJet Stencil Paper
500 sheets, 8.5 x 11 inches, for the InkJet stencil workflow.
VIEW INKJET PAPERTattoo Stencil Printer M8
203 DPI, 210 mm print width, USB and Bluetooth connectivity.
VIEW M8 PRINTERStencil Stuff
Dedicated stencil application product from Tattoo Stuff.
VIEW STENCIL STUFFProton Stencil Gel
Available as Pink, Blue and Black primer products.
VIEW PROTON PINKDynamic Stencil Magic
Dedicated stencil application product in an 8 oz bottle.
VIEW STENCIL MAGICRecovery Stencil Lock
Manufacturer's stencil transfer product in two bottle sizes.
VIEW STENCIL LOCKDynamic Stencil Remover
8 oz remover for correcting stencil placement.
VIEW REMOVERTattoo Stuff Preparation
Prep Stuff for preparation and removal; Spray Stuff for marker-based drawings.
VIEW PREP STUFFBrowse the full Tattoo Stencil category, or choose Stencil Papers, Applicators and Removers for a specific part of your workflow.
COMMON ARTIST QUESTIONS
Tattoo Stencil FAQ
How long should I let a stencil dry before tattooing?
InkJet Stencils instructs artists to let its transfer dry completely, typically 3–5 minutes after removal of the sheet. Spirit says to let the transfer set before wiping. Follow the directions for the stencil paper and agent used.
Why does my tattoo stencil smear or disappear while wiping?
The transfer may still be wet, or the wiping mixture may degrade its dye. InkJet warns that green soap and alcohol-containing wipe mixtures remove its stencil; it mentions distilled water, witch hazel and Dr. Bronner's soap as alternatives reported by artists.
Which sheet do I remove from thermal stencil paper?
Spirit instructs artists to remove the protective onionskin sheet before making a stencil. Its thermal assembly contains three functional sheets and the separate protective onionskin.
Should I choose thermal paper or an inkjet stencil system?
Thermal paper is used with a compatible thermal stencil machine, such as the M8. InkJet Stencils uses dedicated stencil dye, its own printing paper and an Epson EcoTank printer. Choose the method that fits your design preparation and equipment.
Can I use green soap to wipe over an InkJet stencil?
InkJet Stencils specifically instructs artists not to wipe its transferred image with green soap or other mixtures containing alcohol because those degrade the stencil. Follow the manufacturer's cleaning guidance for that system.
How do I remove a misplaced stencil and start again?
InkJet says rubbing alcohol can remove its transfer and instructs artists to let the skin dry before reapplying. Dynamic sells Stencil Magic Remover, while Tattoo Stuff sells Prep Stuff for stencil preparation and removal. Make a fresh transfer after correcting the placement.
How much stencil primer should I apply?
Spirit recommends a thin layer of transfer agent, and InkJet directs a thin, even application of its Stencil-Prep product. InkJet warns that a wet preparation layer can blur the lines.
Can deodorant replace a tattoo stencil primer?
Use a product specifically designed for transferring tattoo stencils, following the chosen paper manufacturer's instructions. Spirit and InkJet both publish application methods built around dedicated transfer agents.
Do I need a stencil printer, or can I trace by hand?
You can trace by hand using Spirit Classic Freehand Transfer Paper, which is designed for use without a thermal copier. Dynamic Stencil Magic Paper is also described for hand-drawn transfer applications.
How long does a tattoo stencil last on skin?
InkJet describes its stencil dye as remaining visible until the outer skin naturally sheds or the stencil is intentionally removed. During a procedure, follow the system's preparation, drying and wiping instructions to preserve the working reference. Recovery says Stencil Lock helps the transfer last throughout the entire procedure, and Dynamic says Stencil Magic holds up through the entire piece.
What is InkJet Stencils ink, and which printer does it use?
It is the methyl violet stencil dye of the InkJet Stencils system. InkJet says any Epson EcoTank tank printer works (cartridge printers can't take the ink), recommends a new printer such as the monochrome ET-M1170, and prints on Presentation Paper Matte at Best quality. The separate M8 is a thermal stencil printer.
OFFICIAL MANUFACTURER REFERENCES
Sources Consulted
The transfer procedures and product descriptions were checked against Spirit Tattoo, InkJet Stencils, Dynamic Color, Proton, Recovery Aftercare and Tattoo Stuff. Application times are attributed to the systems that publish them.
- Spirit Tattoo — Create a StencilThermal and freehand layers, removal of onionskin, thin transfer agent and stationary pressing.
- Spirit Tattoo — Classic Paper CollectionClassic Thermal 11-inch and 14-inch paper and Freehand formats.
- Spirit Tattoo — Classic FreehandHand-drawn transfer paper without a thermal printer.
- Spirit Tattoo — Transfer CreamPaper-specific application product and pairing instructions.
- InkJet Stencils — Getting StartedInkjet stencil components, Epson EcoTank workflow and artwork preparation.
- InkJet Stencils — Choose Your PrinterRefillable EcoTank requirements and printer preparation.
- InkJet Stencils — Epson EcoTank SetupGloves, stain protection, ink-tank filling and Presentation Paper Matte setting.
- InkJet Stencils — How to Apply a StencilSkin preparation, thin application, 30–60-second pressing, 3–5-minute drying, wiping and removal.
- Dynamic Color — Stencil Magic Paper100-sheet thermal and hand-drawn paper product.
- Dynamic Color — Stencil Magic 8 ozDedicated stencil application product.
- Dynamic Color — Stencil Remover 8 ozManufacturer instructions for clearing unwanted transfers.
- Proton — Pink Stencil Primer Gel at Dynamic ColorManufacturer-supplied primer description and Colombian origins.
- Dynamic Color — Stencil SuppliesProton Pink, Blue and Black stencil primer products.
- Recovery Aftercare — Stencil Lock 4 ozStencil application cream, few-drop application, rinse-solution compatibility and bottle formats.
- Recovery Aftercare — Stencil Lock Collection4 oz and 8 oz product options.
- Tattoo Stuff — Stencil StuffStencil transfer application purpose.
- Tattoo Stuff — Prep StuffSkin preparation and stencil removal.
- Tattoo Stuff — Spray StuffSetting marker and pen drawings used in freehand tattooing.
Editorial note: Updated November 13, 2026. Product applications and timing reflect the named manufacturers' instructions. Use the correct transfer system, the directions for each product and your studio's professional procedures.